DIY Caterpillar Habitat
This post may contain affiliate links. Read disclosure policy.
This DIY Caterpillar Habitat is an easy project that is perfect for kids. Plus, they will learn a lot about their new caterpillar friends. Follow the steps below to create your own caterpillar habitat and learn what caterpillars eat.
Hi, friends, it’s Libby here! I’ve been away from the blog for a bit now – transitioning to the role of momma to two with the addition of our baby girl in March 2015. That transition isn’t easy!
I’ve found their closeness in age to be beautiful and difficult, simultaneously. One of my many challenges has been attempting to maintain that one-on-one relationship with my son – when we’re not one-on-one any longer.
Thankfully, my daughter naps like a champ, so I get some alone time with him to do the things he likes to do. And lately, he likes to read books (The Very Hungry Caterpillar), play interactive games (The Very Hungry Caterpillar), and pretend (sometimes that he’s a caterpillar) to be whatever is on his mind for the day.
He likes caterpillars, can you tell? The title of this post is about to become a lot more relevant.
Caterpillar Habitat… Father’s day gift
The afternoon before Father’s Day 2016, I had yet to come up with a clever, crafty, personal gift to give my husband from the children. Which, when they’re young, is usually – ultimately – from me.
My son and I were spending some time together on the front porch while Sissy was napping. Lo and behold, there is the tiniest fuzzy caterpillar. A common Banded Woolly Bear.
Suddenly inspired, I researched the little guy, his likes and dislikes, what his future held, you know – all those things you’re interested in when you meet someone new.
I decided that we would attempt to create a habitat and present this little guy as a Father’s Day gift to my husband. Sure, he might find it to be a silly gift, but my son would be thrilled.
My hope is that you might be inspired to try something similar, and that your child(ren) will be able to be just as excited as mine!
This post contains affiliate links. A Blossoming Life is a participant in Amazon Services LLC Associates Program, an affiliate advertising program designed to provides means for us to earn fees by linking to Amazon.com and affiliate sites. We only link to products we use and love or would use.
DIY Caterpillar Habitat
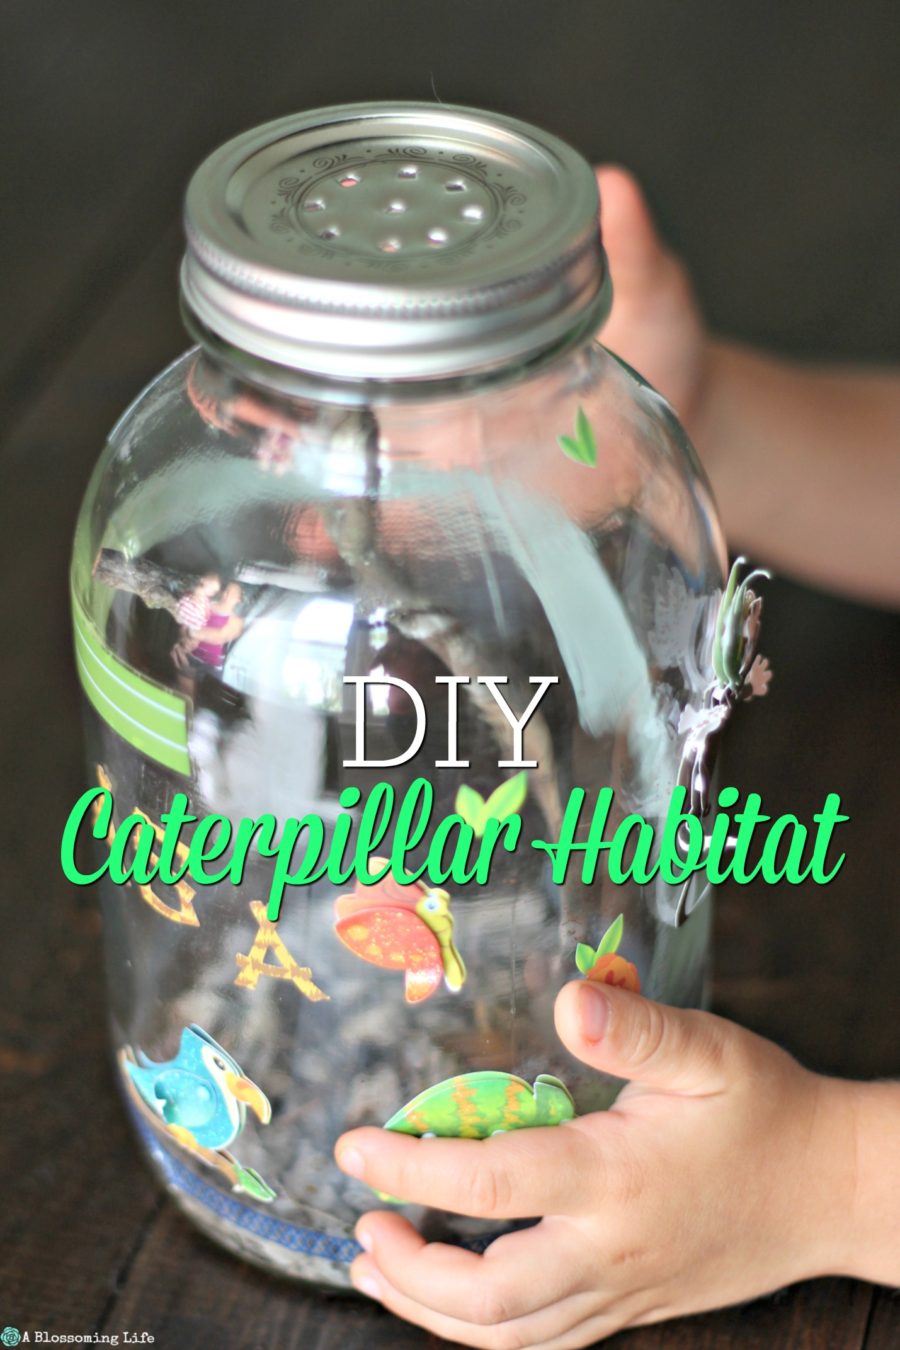
Step 1: Use a clean, empty jar with a lid (we like these half gallon mason jars), and pierce the lid with holes for ventilation. I know, I know… common sense.

Save This Recipe
Step 2: Create an environment beginning with a dirt or pebble base. Many sources suggest using the soil or stones from where you first found your caterpillar. Sure! Add in some grass or leaves, but I would recommend limiting the amount. The plants will wilt and mildew over several days, and a caterpillar is a longer term commitment. Mildewed plants will need to be removed. I added a stick for the caterpillar to crawl on, and he seemed to appreciate that.
Step 3: Totally optional here, but since our caterpillar habitat was also a gift, we decorated the jar. Really, what does it hurt? I let my son decorate with stickers (leftover from his baby shower three years ago…yeah…haha). Paint, twine, glue and buttons…the possibilities are endless. However, I suggest decorating before adding the caterpillar to lower the risk of the little guy being shaken too much. Also, don’t add too much decoration so that you hinder your view of the caterpillar and habitat.
Step 4: Add your caterpillar to his new, temporary home, and settle in for potentially weeks or months of quiet, gentle entertainment. It may sound boring, but to a toddler who enjoys checking on the caterpillar each morning, it’s a lot of fun.
What do caterpillars eat?
Step 5: Feed your caterpillar fresh leaves from your yard every couple days or so. You’ll be able to watch him chew through the leaves, and when they’re pretty well eaten up, you’ll know he’s ready for more. You can even put the leaves in a small storage container or bag and set them in the fridge overnight, which will provide your caterpillar cool, crisp leaves to eat. I hear they like that. Water isn’t always necessary, as they receive plenty of hydration from the water in the leaves, but you can add a fine mist to the leaves if things seem overly dry. I just let a few drops of water plop down onto his leaves from my fingertips. Your caterpillar will eat and poop. What toddler isn’t interested in either of those things?
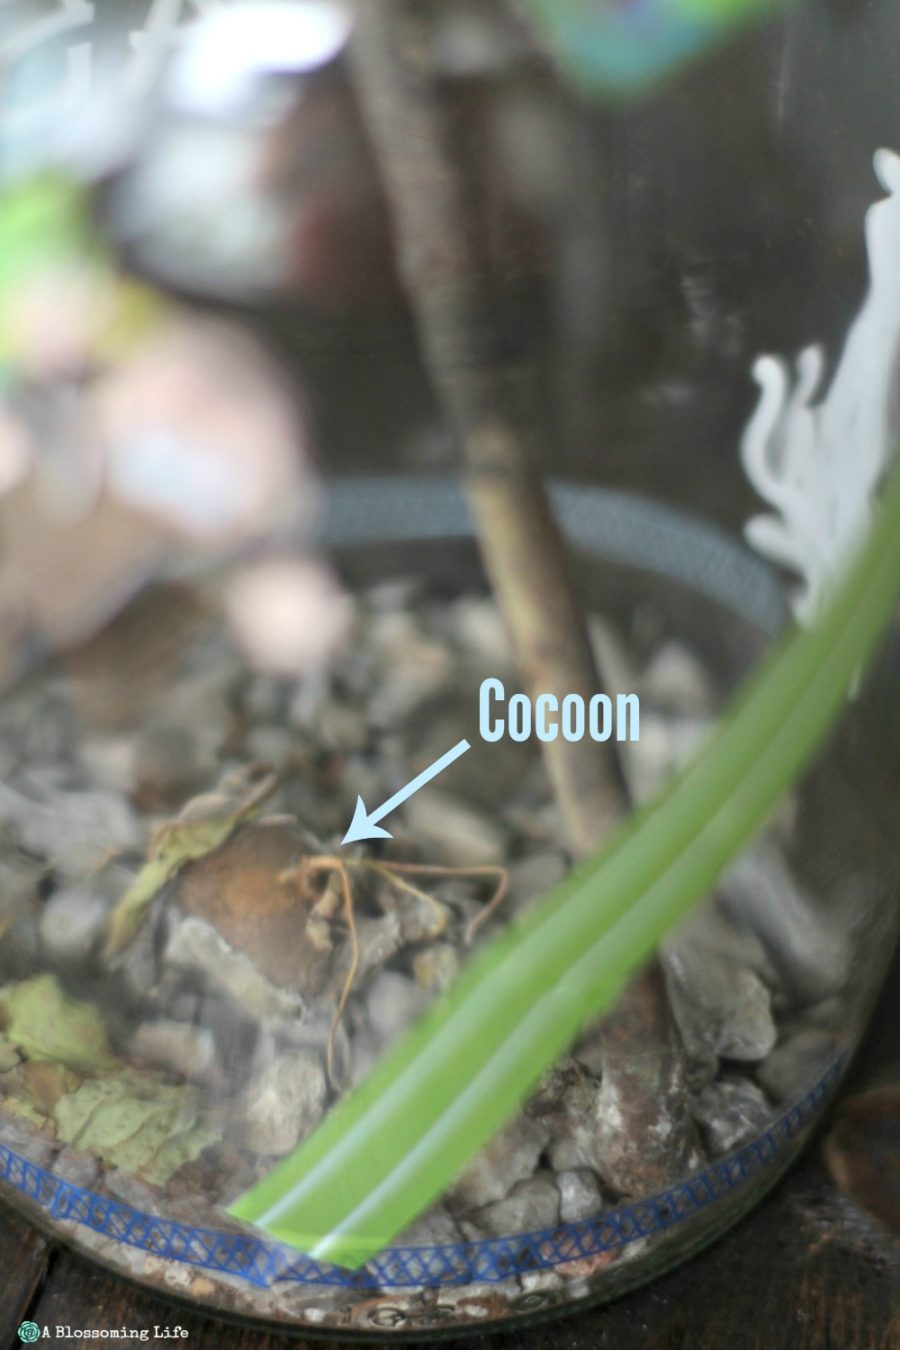
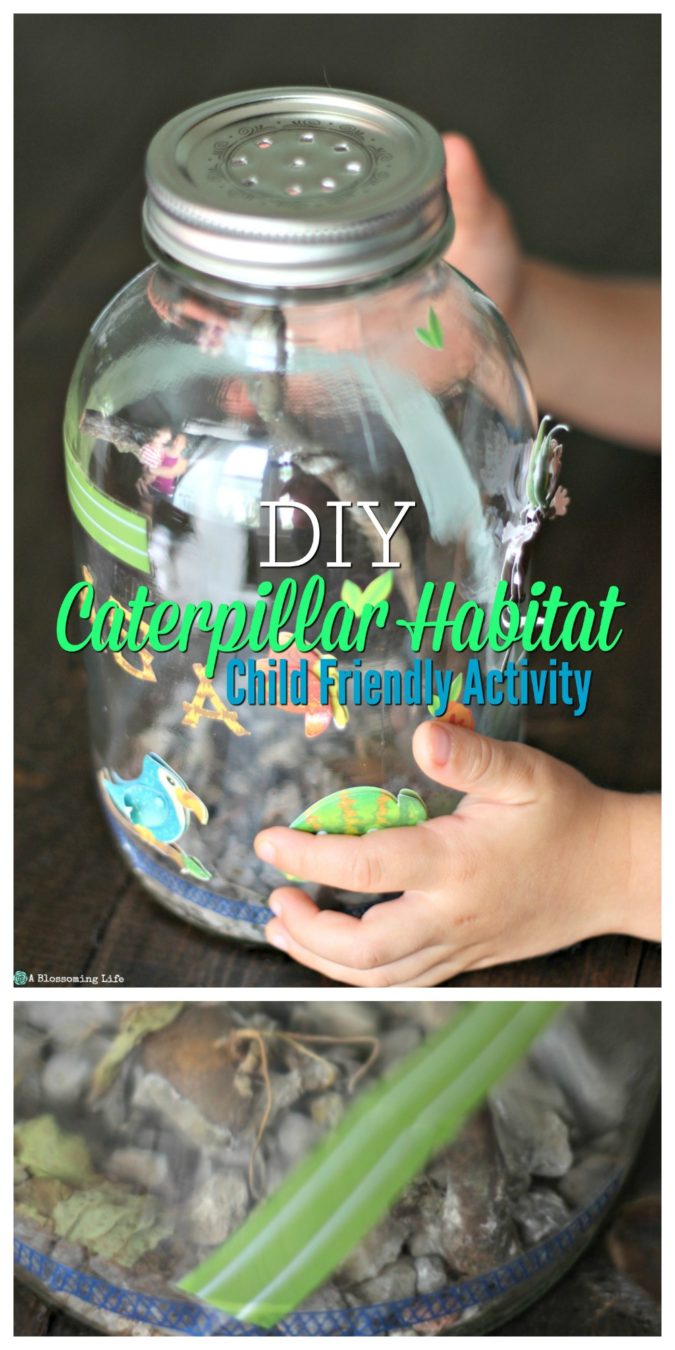
Step 6: Cocoon! Do your research for the type of caterpillar you find, but at some point, it will happen. Our half-inch-long caterpillar nearly tripled in size over six weeks before suddenly spinning his cocoon! The cocoon has the appearance of a kiwi, in the shape of a Robin’s egg. Ours is nestled in the leaves and rocks on the bottom of the jar, but you’ll have to look closely. At this point, it’s not a bad idea to carefully remove any plants that might mildew during this stage.
Step 7: We’ve not reached this stage yet, but when the moth or butterfly finally emerges, let your little one get some serious viewing time in, snap a few pictures, and then be prepared to release it back into the wild. Our moth, in particular, has a short window to find a mate upon emerging from the cocoon, and their lifespan is very short. In fact, for ours, they don’t actually have a mouth (weird!), so they essentially starve to death. I’ll explain that to my son in about 20 years. Until then, I’ll simply explain that the little moth just needs room to fly and the opportunity to go and start a family. Easy enough. And true.
How long does it take for a caterpillar to emerge?
As of today, our caterpillar has been inside his cocoon just shy of three weeks. According to sources, our Woolly Bear caterpillar will emerge as a Tiger Moth. As far as a timeline goes, we expect him to emerge between one and three weeks of cocooning. Each morning, we check on him with expectation. There is always the chance we could be disappointed by a winter-long cocoon stage, but most of what I’ve read suggests about three weeks. We’ll update you.
Overall, this has been a fun and educational experience for my son. He loved watching the caterpillar move around and chew through leaves. Much like the book depicts, except no chocolate cake, sausage, lollipops, or cherry pie. During the cocoon stage, there’s less excitement day to day, but the anticipation of our new Tiger Moth emerging is a lot of fun. It’s been a special experience for our little boy. We love viewing nature, and becoming a part of it through our very own caterpillar habitat has created many great memories. It’s been an opportunity for our little boy to learn more about gentleness, patience, provision, and nature – all great things!
Try it out! If you have already been through this process, let us know how it worked for you and your little ones!
**By the way, my husband appreciated the gift as the interactive experiment that it was. He’s a good man.
 Need more fun kid activity ideas? Check these out!
- Homemade Cloud Dough is a really fun activity!
- This Fall Sun Catcher Craft was a hit.
- 10 Fall Toddler Activities
This post was updated on 10/18/18.
One Comment