DIY Wooden Ornaments With Holly
This post may contain affiliate links. Read disclosure policy.
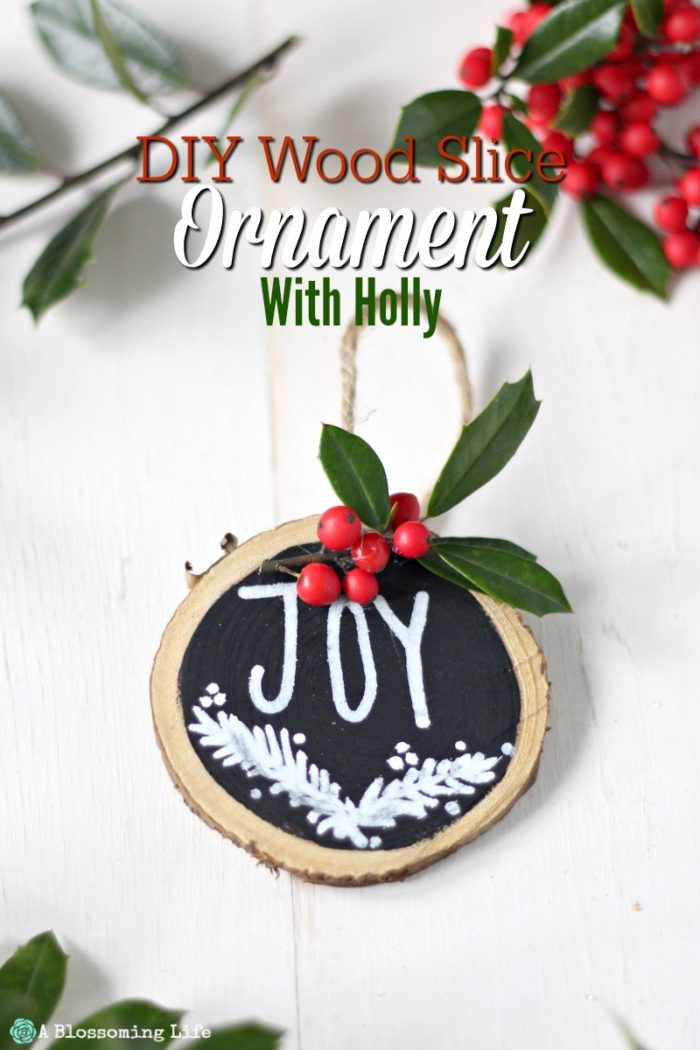
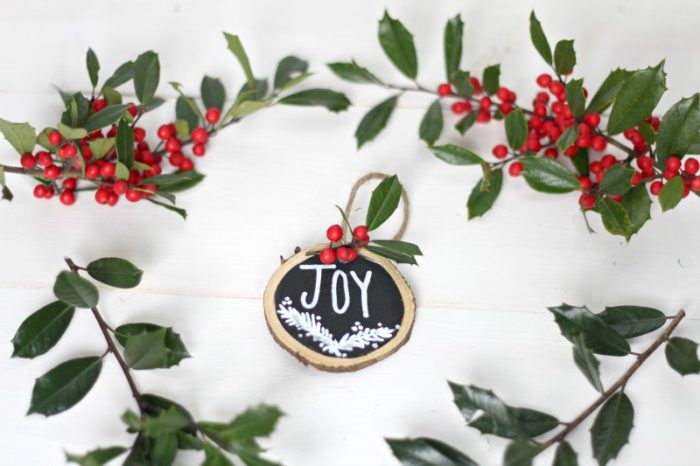
Make these DIY Wooden Ornaments Wsth Holly as a simple and beautiful wooden Christmas ornament to decorate your tree or to give as a homemade gift. Add rustic charm to any home this holiday season. Follow the step by step instructions below or check out the video to see how easy this craft is.
Materials you need: wood slices, black acrylic paint (optional), twine, holly, fresh or faux, white paint pen or paint, glue or hot glue, and a drill.
This post was updated November 10, 2018
Christmas time is coming up quickly. Not really sure how that happened, but even though it is almost December, I have ZERO Christmas decorations up. Gasp. Between traveling and lack of time, it just hasn’t happened. Honestly, I still have a fall wreath hanging on the door outside. You may be way ahead of the game.
Today, I’m are going to who you how to make these simple DIY wooden ornaments you can make for your Christmas tree or for a fun and inexpensive gift idea for friends.
Homemade Gift Idea
These make such great handmade Christmas gifts. Every year, my heart’s desire is to give all of my friends gifts and then looking at the budget, reality sets in. Still wanting to show my love and gratitude to my friends I love to make some homemade gifts like these chalkboard ornaments.
This handmade gift is so easy and anyone can do it. Personally, I’m not very good at hand lettering, and I somehow accomplished this, so I think you could, too!
If you want to make this project even simpler, you could not make it a chalkboard ornament and just not paint the middle black. I love the idea of leaning out the . black paint to show the raw wood and writing on top of that. You could also make a bunch of these and turn them into a wooden garland. How adorable would that be with some greenery and these wooden ornaments strung on twine wrapping the greens and hung over the fireplace. I may just need to add that to my decor list this year.
Oh, and here is a little video to show you how to make the wood slice ornament.
How To Make Wooden Christmas Ornaments
The following are affiliate links. We are a participant in the Amazon Services LLC Associates Program, an affiliate advertising program designed to provide a means for us to earn fees by linking to Amazon.com and affiliated sites.
I had a lot of the materials on hand so this was a pretty inexpensive project.
Materials:
- Wood slices (Like these)–
 I purchased these from Hobby Lobby for $4.
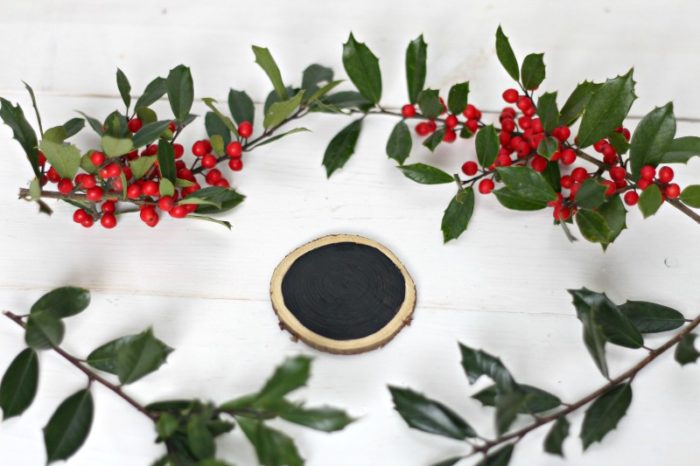
 - Black craft paint
- Paint brushes
- Chalk paint pen (Like this one)– or you can paint letters, if you’re awesome like that.
- Drill with drill bit (The drill we use is from this kit)
- String (Like this one)
- Holly (dried or fresh)
- Hot glue gun and glue
This video shows you just how simple it is to make these wooden ornaments.
Save This Recipe
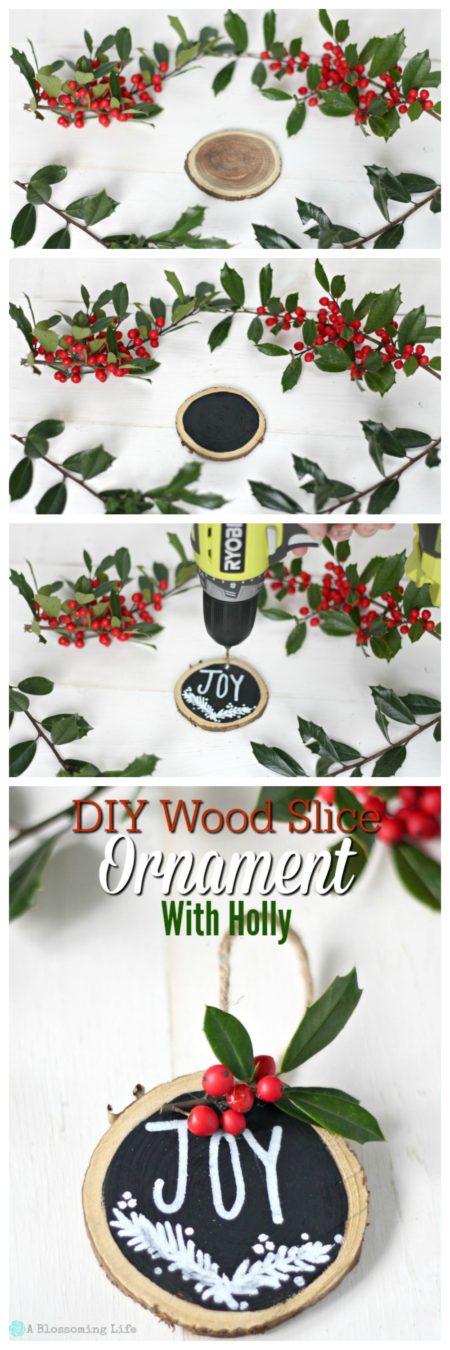
Step By Step To Making Wooden Ornaments
Here is the step by step tutorial on how to make these adorable wooden Christmas ornaments. You can make them into chalkboard ornaments or leave them unpainted for a simpler more rustic wooden ornaments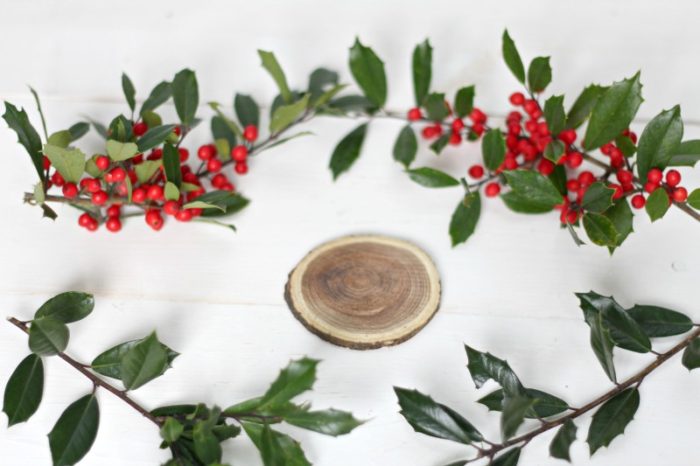
Step 1:
Start with a wood slice and paint the inside with black paint, following the ring.
Step 2:
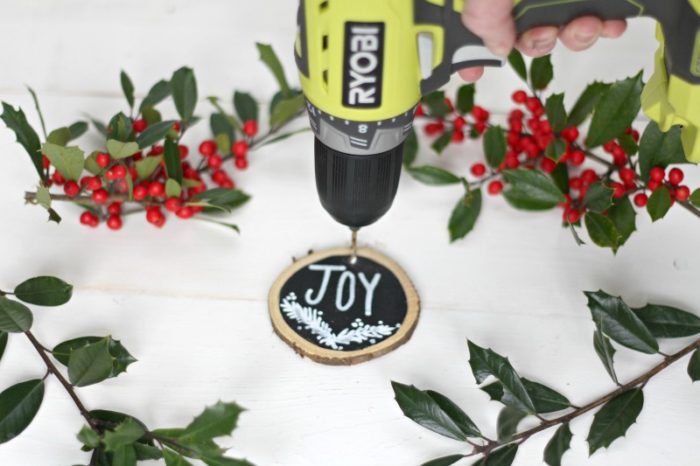
Drill hole on the top middle potion of the wooden ornaments.
Step 3:
Draw design using chalk pen and drill hole on the top middle portion.
Step 4:
Thread string (I used twine, but you could definitely use ribbon) through the hole and tie a knot. Trim extra string and put knot on the backside of the ornament towards the hole. Hot glue holly in place, and you’re done.
Not too hard, right?
Other Wooden Ornament Ideas
There are so many ways you can customize these chalkboard ornaments. Change up the words, add different fun designs like reindeer, snowmen, etc. You could also change up the holly and add bells, tinsel, twine ribbons, or paper snowflakes.
Need more holiday decorating and gift ideas? You may also like…
- Easy DIY Holiday Wreath
- 25 DIY Natural Holiday Gifts
- Chalkboard Gift Tags
- Or check out these cute Printable Christmas Gift Tags
2 Comments