DIY Nursing Cover Scarf in 5 Minutes
This post may contain affiliate links. Read disclosure policy.
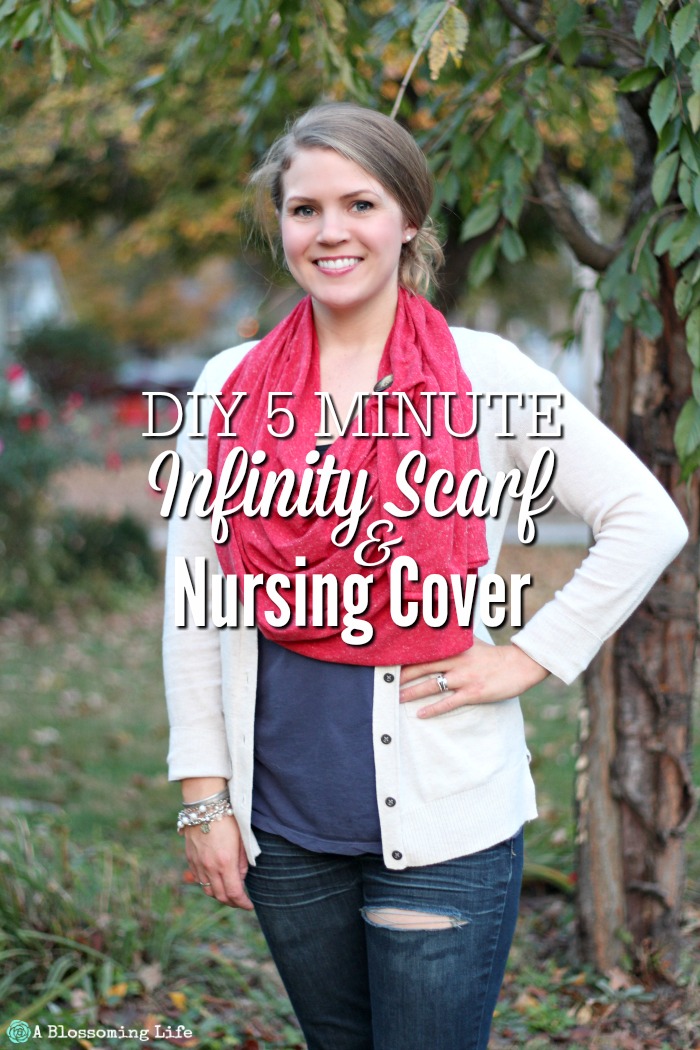
Learn how to make your own DIY Nursing cover and infinity scarf in 5 minutes. If you can sew a basic straight line, than you can follow this simple homemade breastfeeding cover tutorial. Follow my tips below on how to make a my favorite DIY nursing cover.
To make this nursing cover, you will need: stretchy jersey material, thread, scissors, sewing machine, and a button (optional).

This post was updated December 2018
DIY Nursing Cover Backstory
Nursing covers are the worst! Well, not this one. But most of them.
I had one that I used a lot when August was little. It was the one with the wire neck so I could easily peak at her while she was nursing. You know, to make sure she wasn’t causing any trouble. The only problem with this cover was once she got old enough, it wasn’t a nursing cover anymore… it was a fun game of trying to expose mom while breastfeeding. And let’s just say this might have happened. She may have flashed me to our friends that were about to have a baby.
Clearly, I was just preparing them for what was coming… at least, that’s what I told myself to make me feel better about the situation. So, eventually after this charade happened a few times, I just started to remove myself from wherever we were to go nurse baby girl, which is really lame.
The Perfect DIY Nursing Cover
Well, we had an upcoming trip to Oregon and California, which comes with a nice little four-hour flight with a 16-month-old. I just knew that if I was going to use that old nursing cover I would, one: be exposed by little hands waving, and two: my hubby would have to hold it down so I wouldn’t be exposed. Not really a fun experience, if you ask me. My friend, who has twins, was showing me her nursing cover, and it looked really easy to make, so I whipped a similar one up and created this DIY nursing cover. Seriously, 5 minutes. And if I can do it, you can do it.
I really dislike sewing. Sorry to all those sewing lovers out there. But, this DIY nursing cover is amazing! It’s light, so August wasn’t a sweaty mess. It goes over your elbows and is a little tight so she can’t wiggle out of it or flash me. And, I could easily peak at how she was doing. Plus, it’s adorable. Perfection.
Tips For Making a DIY Nursing Cover
- Use stretchy jersey fabric for easier use and so that it doesn’t fray.
- Pick out your favorite color fabric and search online for more pattern choices.
- Pins are your friend with stretchy fabric.
- Having good sewing scissors makes this much easier. See my recommendations below.
Want more sewing tutorials? Check these out!
Yes, I know I said sewing wasn’t my favorite… but that doesn’t mean I don’t do it.
- These DIY Unpaper Towels are a huge hit!
- 80’s Pleated Dress to Fabulous Skirt
- DIY Homemade Stamps and Hand Stamped Pillows
- Infinity Sweater Scarf
The following are affiliate links. We are a participant in the Amazon Services LLC Associates Program, an affiliate advertising program designed to provide a means for us to earn fees by linking to Amazon.com and affiliated sites.
How To Make A Nursing Cover
Follow this simple tutorial on how to make a DIY nursing cover… no pattern required.
Save This Recipe
DIY Nursing Cover Materials:
-
-
- Stretchy jersey material
- Scissors – (Like these ones)
- Thread
- Button – optional
-
Directions:
Step 1:
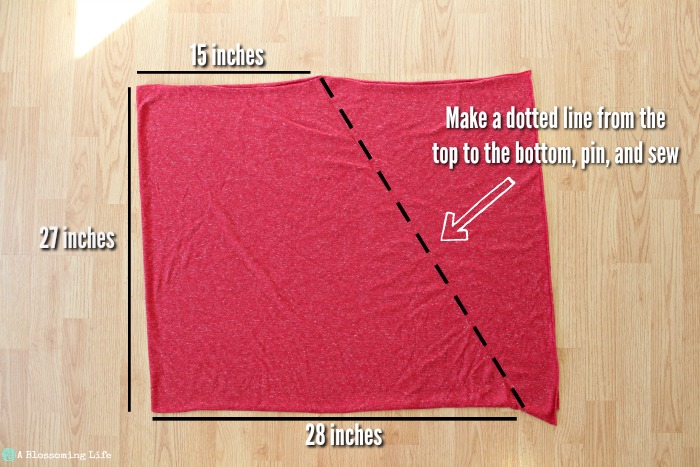
If you want to do the cover with the button, then lay out fabric wrong sides together, salvage ends touching, and making sure it stretches length ways. Cut fabric 27 inches long.
If you are not going to add a button than put right sides of the fabric together.
Step 2:
Measure 15 inches at the top and make a mark. On the bottom, measure 28 inches and mark.
With a ruler, connect the top mark to the bottom mark using a dotted line. Pin along the line and sew. You can be done here. Or you can, A: cut the excess fabric off, or B: move on to add a button.
Step 3:
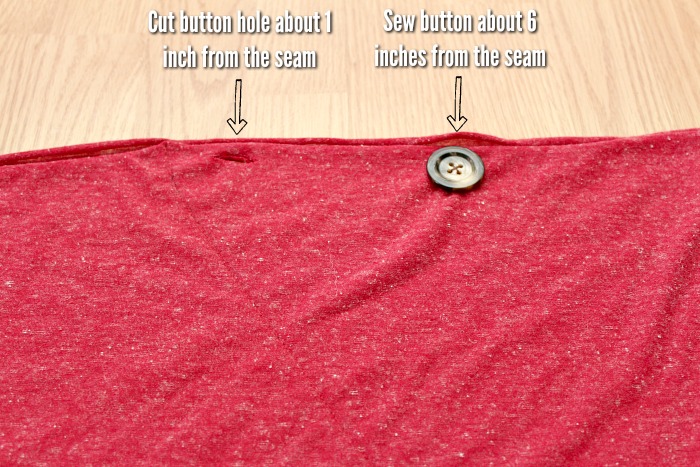
On the excess fabric section, about four inches from the smaller opening, sew on a button going through both layers of fabric.
Step 4:
Make a button hole at the top (the smaller opening) in the excess fabric area about 1/2 inch from the seam. Really proper placing, I know. Just roughly around that area. You don’t need to hem any of the edges since the fabric won’t fray. Yay!
To use DIY breastfeeding cover:
Place wide part of scarf over shoulders and pull down to elbow. Feed hungry baby until happy.
Wasn’t that super simple? Wear your adorable scarf and nurse your baby in peace.
If you love reading all things birth and breastfeeding, check out a few of my favorite posts:
- Ari’s birth story: super fun story about my water breaking at Trader Joes.
- August’s birth story
- Dear Breastfeeding Mom: it will get better.
- Breastfeeding Must-Haves


