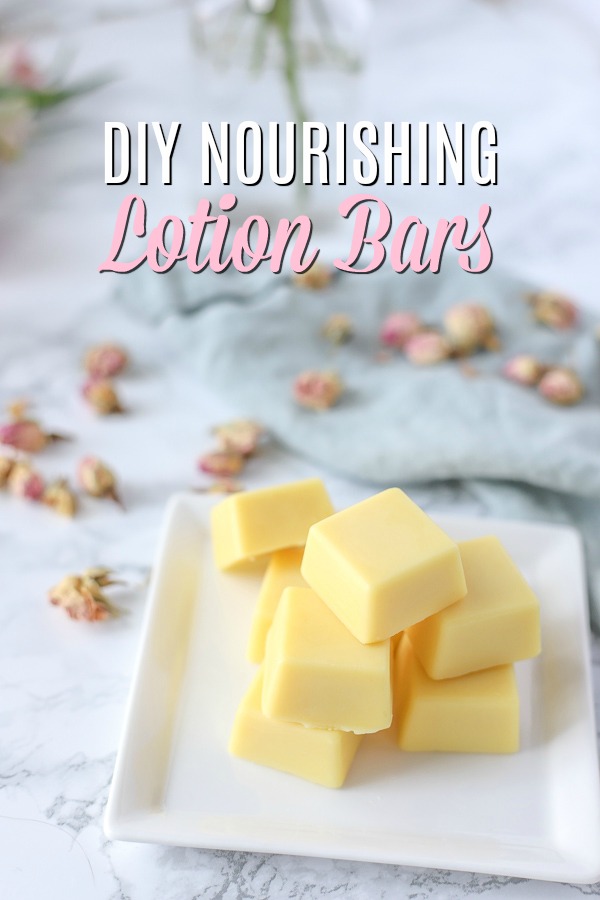
DIY Lotion Bar Recipe For Soft Nourished Skin
This post may contain affiliate links. Read disclosure policy.
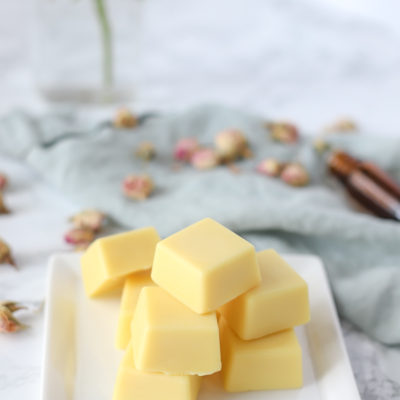
This nourishing lotion bar recipe is made from just a few simple ingredients, and it will leave your skin feeling soft without feeling greasy. DIY lotion bars are a great way to protect, nourish, and soften dry skin.
DIY Lotion Bar Recipe Backstory:
“MOMMMMM did you make butter? That butter looks sooooo good” my 3-year-old yelled at me while rubbing her sleepy eyes. Nap time is my creation time. During one afternoon, I whipped up this DIY lotion bar recipe while the kids were sleeping, so she was very surprised to wake up to seeing “butter.” Butter is her favorite food. I’ve caught her eating butter packets on the way home from restaurants because she snuck them into her pockets. Silly girl.
But this “butter” was not butter at all; to her dismay, she couldn’t eat them at all because they were actually DIY lotion bars.
As I’ve mentioned here 100 times, I have the driest hands, and they are constantly cracked. No matter how much I slather them with lotion, nothing seems to help.
That was until I created this lotion bar recipe. It is full of nourishing butter and oils that are hydrating to the skin. Plus, the beeswax helps keep the ingredients on your skin without feeling greasy. Every time I use it, I’m surprised at how soft my skin feels.
What are hard lotion bars?
Hard lotion bars are simply nourishing ingredients put together that are solid at room temperature. They are used to help moisturize, heal, and protect dry skin. They are also convenient to carry around. You can place one in a tin and always have it handy in your purse.
It is almost like a hard lip balm… but for your skin. Actually, that is a really great way of describing hard lotion bars. Lip balm, but for your skin.
The following are affiliate links. We are a participant in the Amazon Services LLC Associates Program, an affiliate advertising program designed to provide a means for us to earn fees by linking to Amazon.com and affiliated sites.
DIY Lotion Bar Recipe Ingredients:
- Beeswax: helps protect and seals moisture into the skin. It also contains antiviral, antibacterial, and anti-inflammatory properties, making it a wonderful way to help skin. It also is hard, and gives this DIY lotion bar recipe its structure. (source)
- Shea butter: is full of fatty acids, vitamins, and anti-inflammatory properties to make it very nourishing to the skin. It can also help soften and tone skin.
- Oil: You could use a variety of different oils for this recipe. I chose to use jojoba oil and apricot seed oil.
- Vitamin E (optional): full of antioxidants, vitamin e can help reduce appearance of scars and help moisturize the skin.
- Essential oils (optional): Pick essential oils that are calming for the skin and smell nice, like lavender. Other great essential oils options would be: chamomile, frankincense, melaluca, etc. Avoid using photosensitive oils like citrus oils. Watch my free essential oil 101 class here.
Tips for making this lotion bar recipe:
- Silicon molds are really handy, but aren’t totally necessary.
- If you don’t have a silicon mold, you could use a muffin tin with muffin liners.
- Be patient. It can take a little bit to get all the ingredients melted together. I cleaned the kitchen and did some laundry between stirring.
- Speaking of stirring: stirring will help this combination of ingredients melt a little faster.
- If you like a want a harder lotion bar use 2 tbs of oil, if you want more of a “softer” hard lotion bar add 3 tbs oil. This gives it a smoother consistency that melts a little easier.
Tools you may need to make DIY lotion bars:
Saucepan, glass bowl (I love these bowls), measuring cups and spoons, silicon mold (like this one), and a spoon.
How do you make this lotion bar recipe?
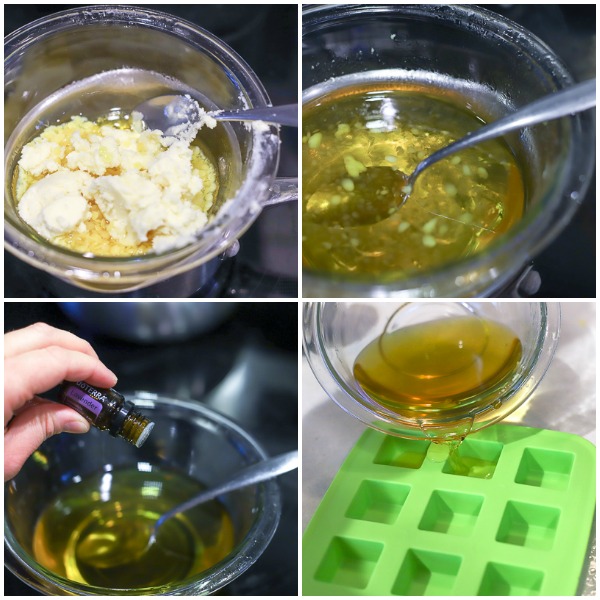
Step 1:
Place shea butter, beeswax, and oil in a heat safe bowl and place over a sauce pan with a few inches of water (creating a double boiler) over medium heat. If you are using the microwave to melt it, make sure it’s a microwave safe bowl.
Save This Recipe
Step 2:
Melt ingredients completely and stir frequently to help them melt.
Step 3:
Take off heat and stir in essential oils and vitamin E oil.
Step 4:
Pour into molds and allow to harden. That’s it!
How to use lotion bars:
- Place lotion bars in hands and rub hands together to help it melt a bit.
- Rub it over desired places where skin is dry: hands, elbows, knees, arms, legs etc.
- Put DIY lotion bar down and rub the leftover mixture onto skin.
How long do lotion bars last?
This DIY lotion bar recipe should last 12-18 months without a problem. If it starts to smell funky, it’s probably no good and time to pitch it.
What do you do with lotion bars?
They are meant to help moisturize your skin. Rub them over dry, chapped skin to help protect and seal in moisture.
My favorite essential oil combinations:
- Lavender, chamomile, and lemon in equal parts.
- Lavender and mint. 2:1
- Germ Fighter – smells like Christmas.
Want more DIY Natural Products? Check out some of our favorites!
- DIY Hair Pomade is a hair sculpting wax made from 3 ingredients and lasts all day.
- I love this DIY Charcoal Face Mask– helps nourish and detoxify the skin.
- Pair that with my favorite Coffee Face Scrub and your face will thank you.
- Or this Herbal Face Toner – this is like spa day for your skin.
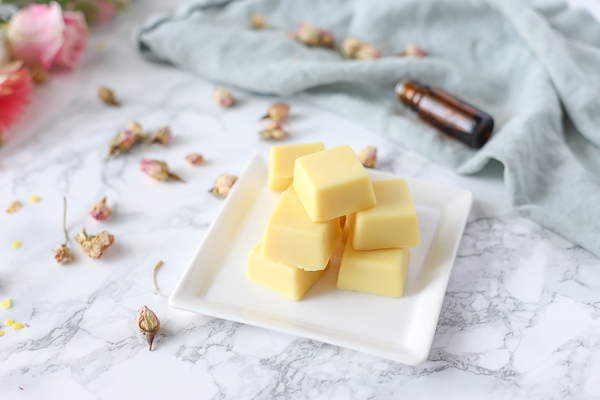
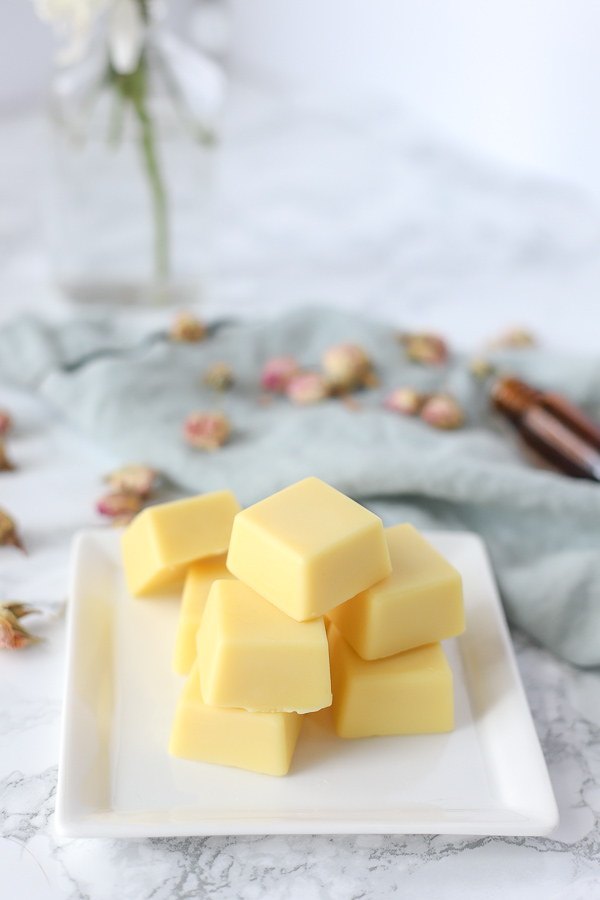
Lotion Bar Recipe
This simple recipe is made with just a few ingredients and will help moisturize the skin without feeling greasy. Perfect for that winter time skin.
Nourishing DIY Lotion Bar Recipe
Save This Recipe
Ingredients
- 1/2 cup beeswax I use pellets
- 1/2 cup shea butter
- 2-3 tbs oil I used 1/2 jojoba 1/2 apricot
- 20 drops essential oils or more
- 1/8 tsp vitamin e oil optional
Instructions
- In a double boiler or microwave safe bowl, place beeswax, shea butter, and oil. Heat until completely melted stirring frequently.
- Stir in essential oils and vitamin e oil.
- Pour into silicon molds and allow to cool completely.
- Pop DIY lotion bars out of mold and store in a container with a lid or ziplock bag.
Notes
Have you tried to make lotion bars before?
This post was updated August 2019
Loved it.. I use it on my lips as well.. Awesome results.. Thank u for the post..
Yay glad you love it!
My lotion bars are to soft. Can u please tell me what I can do to make them harder!!
Hmm I’m sorry that happened. You could always remelt it and add a little bit more beeswax.