How To Paint Trim The Proper Way
This post may contain affiliate links. Read disclosure policy.
Learn how to to paint trim the easy way to give your home a beautiful new update. Give your home a fresh update without spending a lot of money by giving your trim a coat of paint.

When we first moved into our house almost a year and a half ago, my mind couldn’t wait to paint every inch of this house.
Ya’ll our house was dark!
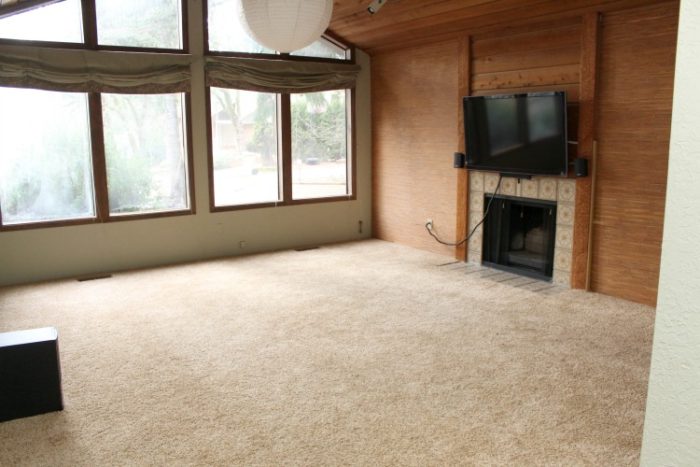
We have huge, and I mean huge, windows everywhere. But between the dark olive green color on the walls, the dark stained wood trim, and the ridiculous amount of trees in our yard, it is always dark. If you don’t believe me, check out the before tour of our house.
Before
I never realized how much the light, or lack there of, affected my mood. Darkness can really put a damper on ones mood.
We immediately slapped white paint all over the dark green walls in the main living areas, which really brightened up the space. But that dark trim was always lurking.
Around every corner, there was that dark trim nagging me to paint it. I love light and bright, and love how white trim pops off the wall.
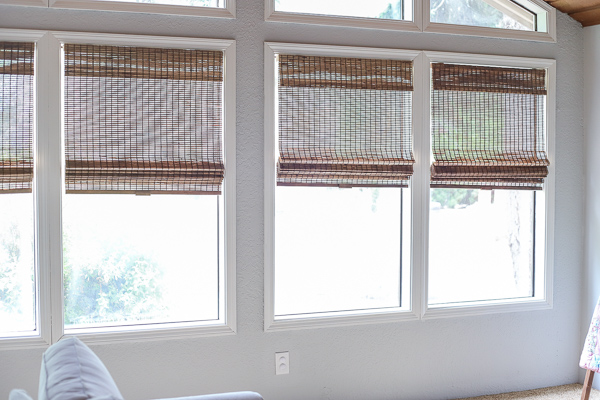
Now that 90% our our trim is painted, I can say that painting it was one of the best decisions we made in our house. Going from dark stained trim to white has really updated the space.
It’s amazing just how a little paint can make such a huge impact. You can see how we painted our fireplace tile and surround or our budget friendly kitchen renovation.
Crazy how much better it looks.
After
There is definitely a right and a not so right way to painting trim, and I may have learned the hard way. I painted in a hurry, not taking the proper steps and I have peeling trim in a few rooms. Since painting trim the proper way, this is no longer the issue. Beautiful white trim that doesn’t chip or peel.
So let’s get started and learn how to paint trim the right way so you don’t make the same mistake.
What kind of paint do you use on trim?
Semi-gloss is the go-to for most people. It has a slight shine which pops against walls and is easier to clean. Can you use a flatter shine? Yes. But I wouldn’t go for anything less than egg-shell. Truly, my choice would be semi-gloss.
For paint type, I always choose an enamel paint that is no VOC, or at least a low VOC. With small children in the house and wanting to be more environmentally conscience I stick to these.
Can I paint trim in my house without sanding?
You should sand trim before painting it because the paint needs something to stick to and if it stained or previously painted it will have a hard time sticking and will most likely peel when gets nicked or bumped. If you do not want to sand, you could use a liquid sander/deglosser. But trust me, you don’t want to skip on on sanding trim.
Save This Recipe
Do you paint trim before walls?
It is best to paint trim before walls. This is how professionals do it because it is usually quicker to tape off trip than it is walls. Most people will paint trim, then the ceiling, than the walls last.
Best Paint Brush For Cutting In
This is my absolute favorite brush. The short handle gives amazing hand control and allows the ability to paint a straighter line, in my opinion.
The following are affiliate links. We are a participant in the Amazon Services LLC Associates Program, an affiliate advertising program designed to provide a means for us to earn fees by linking to Amazon.com and affiliated sites.
Tools you will need to paint trim:
Paint brush – This one is my absolute favorite
Primer
Paint – semi-gloss
Paint stirers
Sand paper -120 grit, 100 grit
Spackle – for patching any spots
Putty knife
Paint trays
Paint key to open can
Floor protection -like tarps, drop clothes, or plastic covers
Damp sponge or paper towels.
Love DIY projects? Check out some of our favorites:
- DIY Blanket Ladder
- How To Build A Fireplace Mantel
- How To Paint Fireplace Tile
- Budget Kitchen Renovation
- DIY Side Table Redo
How To Paint Trim Video Tutorial
How To Paint Trim
Prepare Trim For Paint
- Wipe down trim and remove any grime or gunk that may be stuck on.
- Sand trim, removing any shine from it.
- Wipe down trim with damp towel or sponge to remove any sanding dust.
- Fill any holes, cracks, and dents with spackle. Allow to dry, and lightly sand with a 120 grit sand paper.
- Follow directions on spackle for best results.
- Clean any dust from trim using tack cloth or damp towel.
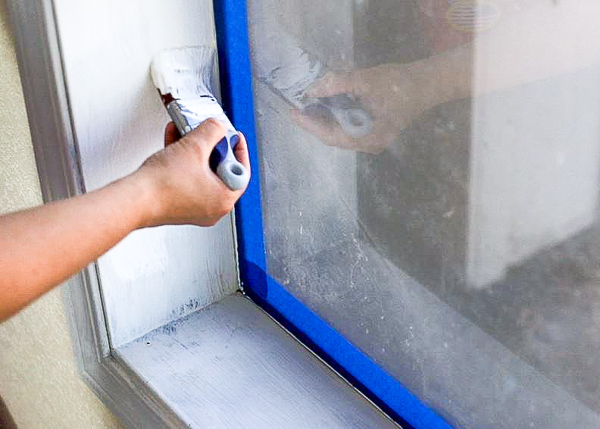
- Dust around walls and apply painters tape making sure not to get tape on any of the trim.
- Tip: use longer strips of painters tape rather than short pieces. Make sure to rub it down well so it is less likely to bleed through.
- Cover surrounding floors with drop cloths or protective floor covering.
- Open primer and mix well using paint stick.
- Pour primer into tray.
Painting Trim
- Apply a coat of primer using angled brush. Drip brush into tray with primer getting about 1/2 inch of primer on the brush. Allow primer to dry for at least 1-2 hours (check directions on primer).
- Make sure not to get too much primer onto the brush.
- If there are spots of bare wood still showing, apply a second coat.
- After the primer has dried, lightly sand with 120 grit sand paper, and then wipe clean using damp cloth, sponge, or tack cloth. Allow to dry. FYI* Many times I skip this step and still have great results.
- Mix paint thoroughly using paint stick and pour into painting tray.
- Using an angled brush, dip brushing into paint about 1/2 inch down making sure not to get too much paint onto brush.
- Paint trim using long brush strokes until paint is completely covered. Continue moving in sections until trim is completely painted.
- If only one coat of paint is needed remove painters tape before paint has dried. If another coat is needed, leave painters tape until second coat has been applied.
- Allow paint to dry.
- Apply second coat if needed and remove painters tape after coat is painted.
How To Paint Trim with Carpet
- Before starting to paint, apply painters tape to the carpet lining up to the trim.
- Taking a putty tool, tuck the tape under the trim.
- Follow instructions on how to paint trim stated above.
It is seriously not too bad! Even when we painted our living room with really tall ceilings and windows that went all the way up. The transformation is totally worth it. Especially for the price. I like a good renovation for basically nothing.
Have you tried painting your trim before?


